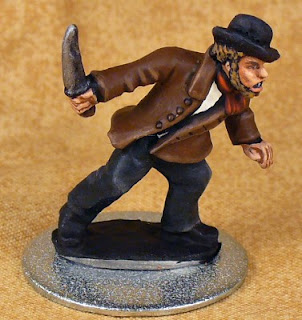
To the left is a photo from that article showing the hedges with one of my Peter Pig figures. (By the way, I've also touched up these figures, improving the shading and highlighting and other details I missed years ago.) I used them for a few 15mm games, but they really have sat in a drawer with the rest of my 15mm, unloved. Well, with my new commitment to 15mm gaming, a couple weeks ago I decided that enough was enough. I needed to do something about the scrawny scouring pad hedges. The "improvements" I made took only a couple hours spread over a couple afternoon, and most of that time was spent pondering more than doing. So here are the improved hedges.
First, I mixed up some Scenic Express Matte Medium at a 4:1 ratio according to the instructions. I also added a touch of Dawn dish water detergent to help the matte medium flow better. I then began brushing this onto one of the hedges. The pad really spreads the matte medium. I found out the hard way that it's best to work on the hedges vertically, so the mixture flows down through the hedge instead running out the sides. You really want to keep the medium in the hedge and not the base's ground cover!
Once the hedge was coated in the medium, I liberally dumped Woodland Scenics Fine Green Grass Turf over the hedges. I did this over an old plastic dish to catch the excess. Using the end of an old brush, I then patted down the turf into the hedge. When done, I placed the hedge onto a paper plate and moved onto the next one.
Since I wanted to move the project faster, I got out the hair dryer to dry the glue.Who'd think that a hair dryer set to High could blow around little bits of scouring pad glued to little wooded sticks? Not me! I should have had a video of that! After cleaning up the counter and retrieving the wayward sticks of scenery, I decided to let nature dry the sticks overnight.
The next day the hedges were dry. I decided to use some of the Woodland Scenics Flowers in 4 Colors I bought years ago but never opened. You get a pack of mustard yellow, bright white, bright red, and burnt orange. First thing I did, though, was dump each little bag into a small plastic container, making storage and use so much easier. I picked up the plastic containers at the local craft store for a couple dollars. There are enough flowers in the pack to last a few lifetimes, so buy enough containers so you can give your buddies some flowers to brighten their day. (Wow, does that sound creepy out of context!)
 |
| I have two containers for each color. Wow. That's a lot of flower power! |
When I "planted" all the flowers I wanted, I then went about sealing the fine turf I had sprinkled on the hedges the day before. If you don't seal it with matte medium, the turf will come off very easily. I diluted the medium a bit more, maybe about a 6:1 ratio. I then brushed the medium onto the hedges. Normally, I would have sprayed it on using a spritz bottle but I need a new spritzer. So brushing worked fine. Turf is ground sponge, so it soaks up the matte medium like a....well...sponge.
 |
| Brushing on the diluted matte medium. |
The next day, I knocked off any excess turf from the hedges and was done. Voilla! No more scouring pad hedges. Next time, I'll paint the hedge to look more like branches and then apply the turf. That should make them look even better, especially near the bottom or places where the hedge got destroyed.
So there you go. Easy hedges! More 15mm goodness coming as I find the time this week.
 |
| If you look closely, you'll see I added more details and highlighting to my Germans. |
 |
| Some flowers, a bit of turf equals better hedges. |


