Tuesday, October 9, 2012

Painting WWII Soviet Infantry - Part 5:
Painting Guides

Articles In This Series
Part 1: Series Introduction, Plus Ranks & Insignia
Part 2: Summer Tunics & Trousers
Part 3: Basing Tips & Tricks
Part 4: Winter Uniforms
Part 5: Painting Guides
Part 6A: Finished Black Tree Design 28mm Infantry
Part 6B: Finished Black Tree Design 28mm Infantry
Part 6C: Finished Black Tree Design 28mm Infantry

Series Overview
This is the fifth in an ongoing series of articles documenting the research I have been doing for painting my 28mm Black Tree Design miniatures for 1:1 skirmish gaming. Finding historical information on Soviet uniforms that gamers can use was very difficult, with much of it scattered across various Osprey and other books, along with some websites. I hope folks find this series of articles helpful and might even stir some interest in gaming the Eastern Front. While I painted 28mm miniatures, nearly all this information is useful for all miniature sizes.

I hope you've been enjoying this series of articles and would love to hear your comments. And if you enjoy gaming the Eastern Front in any scale, please include a link to your blog or online photo pages.

One Size Does Not Fit All
Soviets with a lend-lease jeep with a Browning .50 cal.
While doing the research for painting my Soviets, I came to realize that there was no one correct color of Soviet uniform because of the country's poor quality controls and need for many uniforms quickly. Plus, uniforms quickly faded and changed color once they hit the battlefields. For example, tunics and trousers could range from dark green to light cream, with even some tans and browns tossed in. Equipment also came is many different colors, styles, and materials. It can be quite confusing, as well as very liberating because we needn't worry so much about accuracy as we would when modeling the Western Front.

Since I use 28mm miniatures for 1:1 skirmish games that border on roleplaying games, I wanted my soldiers to have as much individual character as possible and reflect the hard city fighting of Stalingrad and its surroundings. The video game Call of Duty 2 heavily influenced my decision to game Stalingrad.

Some Unity is Important
While I painted the uniforms to reflect the chaotic mishmash look of city fighting, I also wanted them to look like a unified fighting force on the table. Being a modeler all my life, I like to say that we don't model reality but people's idea of what reality is supposed to be. For example, I could have painted the steel helmets and ushanka winter hats all sorts of different colors and shades, which would have been quite realistic for my setting, but I used the hats and helmets to unify the soldiers. This is why I painted all the steel helmets the same shade of green. Same for the ushanka, though I did give a cigar-chomping NCO a grey hat to signify his "special" status.

I begin this post with my own guide I created to paint my figures. I also give you some additional painting guides that you might find useful and more to your liking. Finally, you can also check out the nice WWII painting and camo guides over at Artizan's website.


CPBelt's Soviet Infantry Painting Guide
Here is the comprehensive painting guide I created to paint my infantry so far. It collects the bits from earlier articles and includes a lot of new info. I used Reaper paints because I can get them locally. While I have had some problems with some colors of Reaper paint being too thin or cracking while drying (the Olive triad and Uniform Brown all cracked, along with some others), I really like their Terran Khaki triad. As I paint my remaining figures--such as tankers, snipers, officers, NKVD, sailors, and so on--I'll add that info to this guide.

M35 & M43 Summer Tunics, Trousers, & Pilotka
Unless a soldier was a fresh to the fighting, I often painted the tunic one base color and the trouser a different base color. Often Soviet infantry would take better bits and pieces of uniforms when theirs would wear out. For example, a hardened soldier might have light trousers but a new darker jacket.

Fresh Troops
Highlight: Reaper 9122 Terran Khaki
Base: Reaper 9121 Khaki Shadow
Shade: Folk Art FA449 Olive Green

Veteran Troops
Highlight: Reaper 9123 Khaki Highlight
Base: Reaper 9122 Terran Khaki or Vallejo 988 Khaki
Shade: Reaper 9121 Khaki Shadow

Hardened Troops
Highlight: Reaper 9123 + White
Base: Reaper 9123 Khaki Highlight
Shade: Reaper 9122 Terran Khaki

Poor Quality Conrol Variation
Highlight: Reaper 9127 Uniform Brown + Reaper 9123 Khaki Highlight
Base: Reaper 9127 Uniform Brown
Shade: Americana DA180 Asphaltum

M41 & M43 Winter Uniform
These colors work for both the jacket and trousers.
Highlight: Base + Reaper 9123 Khaki Highlight
Base: Reaper 9162 Driftwood Brown
Shadow (and padding creases): Dark Brown.

Steel Helmet:
Highlight: Base + White
Base: Folk Art FA927 Old Ivy + Folk Art FA449 Olive Green
Shade: Americana DA157 Black Green
Chin Straps: Reaper 9122 Terran Khaki

Ushanka (Fur Hat)
For painting the standard infantry ushanka, you will need the colors below and then follow how I painted the hats. First, I painted the entire ushanka Reaper 9158 Olive Drab and then drybrushed the fur flaps with Reaper 9122 Terrain Khaki and then very lightly drybrushed some Reaper 9123 Khaki Highlight. I then painted the cloth part of the hat using Reaper 9121 Reaper Khaki Shadow, highlighting the edges with Reaper 9122 Terrain Khaki. Finally, I lined the edges of the fur flaps using Reaper 9158 Olive Drab. The last touch is to paint the Soviet stars, touching them up with some black and then simply painting them a shade of bright red, leaving some black along the edge for shading.
Drybrushed: Reaper 9123 Khaki Highlight
Drybrushed: Reaper 9122 Terran Khaki or Vallejo 988 Khaki
Reaper 9121 Khaki Shadow
Reaper 9158 Olive Drab

Blankets
I painted all my blankets using summer tunic colors above. You could also paint them shades of green-grey, maybe a brown, and so on. Again, nothing was standard.

Canvas Gear
This includes cloth grenade satchels, ammo pouches, shovel covers, straps, canteens, backpacks, belts, and anything else made of cloth or cloth webbing. Since there were no real standards, with this equipment coming in all sorts of shades, you can vary the base color as you like, using various khakis and light olive greens. Flap straps could be cloth or leather. I painted buckles a tin color.
Highlight: Reaper 9123 Khaki Highlight
Base: Reaper 9122 Terran Khaki
Shade: Folk Art FA449 Olive Green

Leather Gear
This includes leather belts, straps, and ammo pouches. You really have a wide selection of leather colors to choose from, from reddish leather to brown leather to tan leather. It seems that NCO's and better soldiers got higher quality black leather ammo pouches. From what I can see, belts were never black leather. Below are the three leather variations I used on my figures.
Base v1: Vallejo 940 Saddle Brown
Base v2: Reaper 9030 Leather Brown
Base v3: Reaper 9031 Tanned Leather

Boots
Any black will do.

M43 Shoulder Boards (Summer & Winter Uniforms)
The M43 saw shoulder boards come into fashion, both for summer and winter uniform. The board itself is darker than the uniform and trimmed in a color specific for that branch of service. Infantry shoulder boards, for example, has raspberry colored piping trimming the edges. The button on top of the board is brass.
Shoulder Board Base: Reaper 9121 Khaki Shadow
Shoulder Board Trim: Americana DA276 Razzle Berry

Grenades
Since Soviets practiced assault tactics, they loved their grenades. Again, these could come in many different shades like the uniforms, but I chose to paint them all the same color.
Base: Reaper 9122 Terran Khaki


Panzer Aces Paint Guide
If I remember correctly, this is a guide I took from one of the Panzer Aces series. It uses all Vallejo paints. Some folks might find it useful.

Summer Tunic, Trousers, & Pilotka
Highlight: Base + 914 Green Ocher + 976 Buff
Base: 879 Green Brown + 882 Middlestone
Shade: Base + 872 Chocolate Brown + 950 Black


Winter Padded Jacket & Trousers
Highlight: Base + 976 Buff
Base: 897 Bronze Green with 913 Yellow Ocher
Shade: Base + 872 Chocolate Brown + 950 Black


Cloth Coat
Highlight: Base + 991 Dark Sea Grey
Base: 866 Grey Green + 872 Chocolate Brown
Shade: Base + 950 Black


Steel Helmet
Highlight: Base with 882 Middlestone
Base: 897 Bronze Green
Shade (washed):  950 Black


Ushanka
Highlight: Base with 986 Deck Tan
Base: 886 Green Grey
Shade (washed): 950 Black


Leather Equipment
Highlight: Base + 981 Orange Brown
Base: 984 Flat Brown + 940 Saddle Brown (varnished gloss)
Shade: Base + 950 Black


Canvas Equipment
Highlight: Base + 976 Buff + 951 White
Base: 917 Beige with 881 Yellow Green
Shade: 872 Chocolate Brown


Boots
Highlight: 950 Black + 872 Chocolate Brown
Base: 950 Black (varnished gloss)
Shade: 950 Black


Vallejo Soviet Paint Set
The basic guide below is from Vallejo's Soviet boxed paint set and is for the M43 summer uniform.

Helmet
894 Russian Green or 823 Luftwaffe Camo Green

Greatcoats & Bedrolls
874 USA Tan Earth

SMG Ammo Pouches
983 Flat Earth

Uniform
880 Khaki Grey or 988 Khaki

Boots
950 Black


Sunday, October 7, 2012

Painting WWII Soviet Infantry - Part 4:
Winter Uniforms

Articles In This Series
Part 1: Series Introduction, Plus Ranks & Insignia
Part 2: Summer Tunics & Trousers
Part 3: Basing Tips & Tricks
Part 4: Winter Uniforms
Part 5: Painting Guides
Part 6A: Finished Black Tree Design 28mm Infantry
Part 6B: Finished Black Tree Design 28mm Infantry
Part 6C: Finished Black Tree Design 28mm Infantry

Series Overview
This is the fourth in an ongoing series of articles documenting the research I have been doing for painting my 28mm Black Tree Design miniatures for 1:1 skirmish gaming. Finding historical information on Soviet uniforms that gamers can use was very difficult, with much of it scattered across various Osprey and other books, along with some websites. I hope folks find this series of articles helpful and might even stir some interest in gaming the Eastern Front. While I painted 28mm miniatures, nearly all this information is useful for all miniature sizes.

The M41 and M43 Winter Uniforms
In earlier articles, I focused on Soviet summer uniforms. Now I turn my attention to the padded winter uniforms, which were designed to withstand the brutal cold of the Eastern Front.

There are two main patterns of padded winter uniforms: the M41 introduced in 1941 and the M43 introduced in 1943. Both patterns feature nearly identical padded trousers, called "vatnie sharovari" in Russian. These are so similar that gamers really needn't worry about the details because on 28mm and smaller miniatures one pair of padded trousers looks just like the next pair to my eyes. However, when we look at the winter uniform's padded jackets, called "telogreika" in Russian, we can spot some significant differences between the M41 and M43 patterns.

The M41 Telogreika
The M1 telogreika has the same large, folded-down collars as the M35 summer tunic pattern, which I discussed in Part 2 of the series. Rank insignia are displayed on these collars, as you can see in the drawing of the uniform to the upper left. As I discuss later in this article, most telogreika-clad Soviet WWII miniatures use the M41 pattern.

The M43 Telogreika
The M43 pattern, on the other hand, eliminated the telogreika's large collar, replacing it with a short upstanding collar buttoned at the top. This follows the same collar design as on the M43 summer tunic. As with the M43 summer tunic, senior NCO's wearing the M43 telogreika were to have shoulder boards displaying their rank insignia. However, photos show that many NCO's chose not to wear any sort of shoulder board on their telogreika. The photo to the right clearly shows the M43 telogreika, though the photo looks like a publicity shot because the uniforms and equipment on these soldiers look practically brand new and way too clean to have seen any fighting. (Soviets in WWII were fond of staging publicity photos, including combat photos.)

Mixing and Matching Jackets and Trousers
Because the telogreika was warmer than summer uniform jackets while still allowing a soldier more freedom of movement, soldiers often wore their telogreika in spring and autumn as well as in winter. You can see this in some photos, with soldiers wearing their telogreika and regular (non-padded) wool or cotton trousers, while other soldiers are wearing the full summer uniform.

In fact, on the cover of Red Army Uniforms of World War II in Colour Photographs (1993), you can see the fellow on the right wearing a telogreika along with the summer uniform trousers. By the way, this is a great book, with each page featuring one or more color photos of reenactors in Soviet uniforms. There is also a section of gear. This book has been a valuable asset for me, but its info can be a bit sketchy at times. You can pick up perfectly fine used copies of the book on Amazon for $20.

The Ushanka
Nothing screams Soviet/Russian winter like the ushanka! The ushanka, which means "ear hat" in Russian, is a distinctive feature of Soviet WWII uniforms and remains popular today. (In fact, my nephew up North likes to wear a rather large ushanka. Of course, we in Central Florida have little use for such a hat. But I digress...) Sometimes you might see this hat called a shapka or chapka, but from what I've read WWII uniform books prefer calling them ushanka. These hats come in many colors, from the same color as the uniforms, to shades of brown, to shades of cream, to shades of grey. The Soviet Star on the front flap could be red or gold, though I prefer red for my miniatures. You can tie the ushanka's ear flaps at the top of the hat, pulling the flaps up, or you can lower the flaps over the ears, tying them under the chin to keep you nice and tosty on those cold Stalingrad nights. Pretty nifty and very Soviet-looking!

28mm Miniatures in Winter Uniforms
On the page WWII 28mm Soviet Infantry, I discuss in detail which miniature companies make soldiers clad in winter uniforms and identify the uniform patterns they wear. (Originally, that page started as part of this article but grew too large!) Still, I'll briefly say that Artizan, Black Tree Design, Crusader, Warlord Games, and West Wind figures all wear the M41 telogreika with large collars. The Assault Group and Victory Force figures wear the M43 telogreika with short collar and shoulder boards. Some figures wear padded trousers, while most others wear regular trousers.

Painting Winter Soviet Uniforms
Information about painting Soviet winter uniforms can be found in Part 5 of the series, Painting Guides, which will be posted in a couple of days. I'll also post it as a page. This is a comprehensive list of guides covering all the uniforms covered to date.

Saturday, October 6, 2012

Peel & Stick Street Details

Bill Mosteller of Great Decals now has peel and stick street details such as sewer drains and manhole covers. For example, each O scale sheet includes 8 manhole covers, 2 grates, 2 covers, and 5 each water and gas cutoff lids. (You get more in the smaller scale sheets.) They're ink-jet printed from color photographs of real hardware by Dick Karnes of Mercer Island, WA.

They come in HO scale for $4.95 postage paid, S scale for $2.95 postage paid, and O scale for $4.95 postage paid. HO will work for 15mm-18mm, while either the S or O scale will work for 28mm figures. Kind of nifty if you're making some streets. I thought I'd mention it in case anyone might find them useful.

These are the O scale decals.

Tuesday, September 25, 2012

My Adler Napoleonic and ACW Samples Finally Arrived!

Four weeks ago, the fine folks at Adler sent me a packet of ACW and Napoleonic samples. Just when I had given up hope that I would never see them, consigning the figures to customs purgatory, the packet arrived yesterday.

I was excited and nervous to see these little guys in the flesh. I've seen plenty of photos online, but I've never handled them in the flesh. Dumping them out on the table and then looking at them under my optivisor, I was impressed with their detail and character. My son, who proudly proclaimed he didn't need to wear a goofy optivisor, said: "Oh, they're not as small as I thought. They're really cool looking! But what's up with their heads?" Yeah, the "Adler head" issue quickly reared its...uh....head.

Let's Get to the Details, Shall We?
Overall, I love these little guys. I'm amazed they get so much detail on something so small that's cast in pewter. Because Alder exaggerates some key details like GHQ does with their micro-armor, the figures really pop, making them look more detailed than they really are. Same with the heads, which is kind of like a reversed forced perspective at work when you see the figures on the table. I think the heads look fine. (IMO 28mm gamers should be the last people to complain about larger-than-normal heads! Ever look at a 28mm head compared to a real head? I rest my case!) So a 10/10 for detail and character, that's for sure!

Cue the Flash Gordon Move Theme Song!
Even people just quickly glancing at the photos below can see these figures have a lot of flash. I was surprised how much flash some figures have. Honestly, I didn't notice the flash until after I snapped the photos. To be fair to Adler, not all the infantry strips were as bad as some of these. On a positive note, the flash on the infantrymen cleaned up very easily, even between the legs. The downside, is that cleaning up several 100 tiny figures can take just as long as cleaning up a few dozen larger figures. Another downside is that some of the cavalry were really badly flashed. Oh well. It seems that cleaning flash and mould lines is part of the hobby regardless of scale or material (metal or plastic). So a 4/10 for mould quality but an 8/10 for ease of clean up.

You So Tiny...And Cute
Wow, these guys are tiny...and fragile. I think every time I picked up a strip, I kept bending the rifles and sometimes an entire figure. Still, these Adler figures are more robust than the Baccus sample I got a couple years ago. I don't see these Adler breaking easily at the ankles like my Baccus did. With proper care, I don't think their fragility would be much of an issue. After all, anything this small will be fragile no matter who makes it.

Basing
I would only use Adler figures for grand tactical gaming, placing them on larger bases and far away from base edges where bulging fingers like mine wouldn't damage the figures. I would think that 60mm x 30mm or 60mm x 60mm would work best for my hands, though I know fellows with better hands than mine use smaller bases.

Bottom Line
Would I recommend these figures to someone looking to game horse and musket wars in 6mm/8mm? You bet I would! Will I actually paint at least one French and one Prussian Napoleonic army in this scale? I'm still not sure. I need to mess around with these guys a bit more before I commit any time and money to such a project. Plus, I've been talking with a buddy about starting a Prussian army in 18mm using AB Miniatures to fight his 18mm AB French. (You know, I tend to talk a lot about buying and painting Napoleonic figures more than actually buying and painting Napoleonic figures. But that topic is another post for another day.) Still, these little guys really are pretty neat. I can see why people enjoy them so much.

Many of the infantry have flash along the mould lines as well as between the legs.

I love the detailed backpacks. I could even paint the straps without problems!

I didn't clean up any of these strips. This is how they look fresh our of the pack.


Oh my. The flash on this strip was horrible and a bear to remove. The moulds must have been slightly off as well.


I got some ACW samples as well. Lot's of character, but I think I'll stick to no smaller than 10mm for ACW.


Sunday, August 26, 2012

Assault Girls: Worst Sci-Fi Movie Ever

In nearly 50 years on this planet, I have never proclaimed a sci-fi movie to be the worst sci-fi movie ever made until I watched the unwatchable Assault Girls on Netflix the other night. Sure, over the years there have been some bad science fiction movies. The series Mystery Science Theater 3000 made a living poking fun at such bad movies. But even they would be hard pressed to find anything to poke fun of in this movie because there just isn't anything there! Acting? What acting? Characters? What characters?

Synopsis:  "In the aftermath of global thermonuclear war, three battle tested women wage war in a virtual reality videogame against giant mutant sandwhales. All of them seek to kill 'Madara Sunakujira' the game's end boss but find that despite their high levels, are unable to engage it alone as they wish, forcing them to form a party to defeat it together."

Ok, sounds kind of stupid and bad, but this is a movie from the director of Ghost in the Shell, a far superior product. Yeah, Assault Girls gets horrid reviews on Netflix, but I have enjoyed many supposedly bad movies. And sometimes they can be so bad that they can be fun for me to watch. Boy was I wrong!

I should have known it was going to be bad when the movie starts with something like 15 minutes of exposition explaining what the future earth and its society will be like. Unfortunately, its rambling mess of exposition lost me within minutes. Then the movie (and real pain) begins. Just take a look at the trailer, which I did not see until writing this post. I think it speaks for itself. I had to stop the movie after half an hour--I just could not take it any longer. Come on! Even Battleship has to be better than this movie!


Wednesday, August 22, 2012

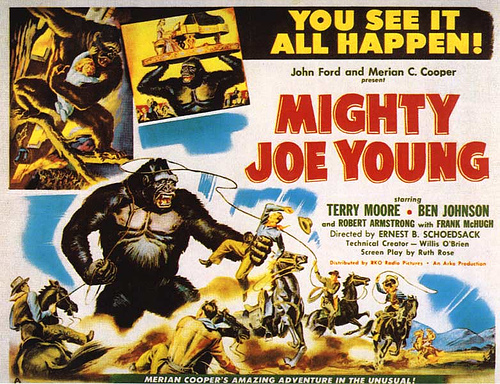
Safari Ltd Toys for Mighty Joe Young Pulp Gaming

The local Jo-Ann Fabric craft store in their clearance section has been blowing out toy figures from Safari Ltd. I left the fairy princess, sorcerer, and other such human figures for kids who would appreciate playing with them, but I did grab the two Lowland Gorilla Males they had, paying only .99 cents each instead of the $7 retail for each.

Being a fan of everything pulp I right away thought of the classic 1949 Ray Harryhausen movie, Mighty Joe Young. I figured the size of the gorillas would work well with 25mm-28mm figures and was right. The photo below shows the toys with some of my figures. Ok so the Soviets are not in the film, but the film sure does have enough cowboy explorers in it. (A nice part of Western gaming is that you can use many of the figures in Wild West shootouts, Africa exploration, mummy hunting, and more--something people overlook.)

I'm thinking about repainting the gorillas, but they look pretty good as they are for now. However, they are glossy toys. I've thought of shooting them with some Dullcote, but I've heard on other forums that Dullcote can have a bad reaction with vinyl figures if the Dullcote contacts the vinyl (A while back I sprayed some Star Wars miniatures with no ill effect, so take that for what it's worth.) Perhaps brush matte varnish would be just as good?

Oh yeah, over the weekend I also picked up a toy elephant from a local thrift store, paying only $1, which at the moment seems to be my favorite price point! Now all I need are the Sergeants 3 pack and some Thuggees from Pulp Figures, and I can game Gunga Din, which I watched for the first time a few weeks ago on TMC. (BTW that project is on the burner.) So keep your eyes out for cool and cheap toy animals, monsters, dragons, and the such for gaming.

I think these scale great. With 15mm pulp figures, you can use the gorilla as King Kong.